Apache Pig: Windows Installation 安装
Prerequisites 先决条件
Apache Hadoop
Apache Pig is a platform build on the top of Hadoop. You can refer to our previously published article to install a Hadoop single node cluster on Windows 10.7zip/Winrar
7zip/Winrar is needed to extract .tar.gz archives we will be downloading in this guide.
Downloading 下载 Apache Pig
Download the Apache Pig
After the file is downloaded, we should extract it twice using 7zip (using 7zip: the first time we extract the .tar.gz file, the second time we extract the .tar file). We will extract the Pig folder into C:\hadoop-env directory as used in the previous articles. Or you could use winzip to extract it.
Setting Environment Variables 设置环境变量
After extracting Derby and Hive archives, we should go to Control Panel > System and Security > System. Then Click on Advanced system settings.
In the advanced system settings dialog, click on Environment variables button.
Now we should add the following user variables:
- PIG_HOME:
C:\hadoop-env\pig-0.17.0
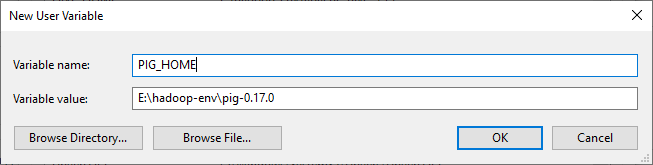
hadoop-envis the folder name of your hadoop.
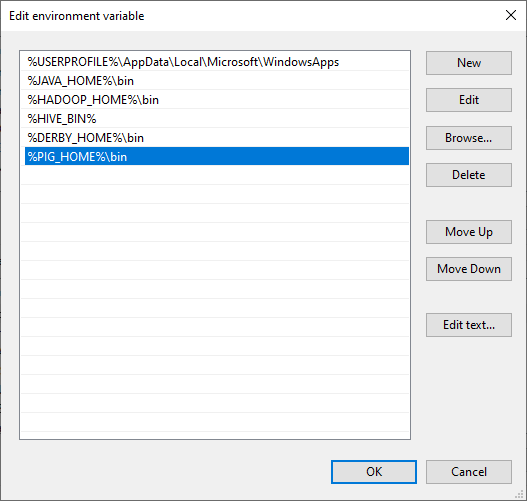
Now, we should edit the Path user variable to add the following paths:
- %PIG_HOME%\bin
Edit pig.cmd file
Edit file D:/Pig/pig-0.17.0/bin/pig.cmd, make below changes and save this file.
- set HADOOP_BIN_PATH=%HADOOP_HOME%\libexec

Validate Pig Installation 验证 Pig 的安装
Post successful execution of Hadoop and verify the installation.
1 | C:\WINDOWS\system32>pig -version |
If you have encountered any problems, please read through the Troubleshooting section.
Example Script
Start the hadoop
Browse through the sbin directory of Hadoop and start yarn and Hadoop dfs (distributed file system) as shown below.
1 | C:\WINDOWS\system32>cd %HADOOP_HOME%/sbin/ |
Remember to run as administrator when executing CMD.
Create a Directory in HDFS
In Hadoop DFS, you can create directories using the command mkdir. Create a new directory in HDFS with the name Pig_Data in the required path as shown below.
1 | C:\WINDOWS\system32>cd %HADOOP_HOME%/bin/ |
Create a text file wikitechy_emp_details.txt delimited by ‘,’ with the content below. Place the file in C: or any directory which you preferred.
1 | 111,Anu,Shankar,23,9876543210,Chennai |
Move the file to HDFS
Now, move the file from the local file system to HDFS using put command as shown below. (You can use copyFromLocal command as well.)
1 | C:\WINDOWS\system32>cd %HADOOP_HOME%/bin/ |
Start the Pig Grunt Shell
The simplest way to write PigLatin statements is using Grunt shell which is an interactive tool where we write a statement and get the desired output. There are two modes to involve Grunt Shell:
- Local: All scripts are executed on a single machine without requiring Hadoop. (command:
pig -x local) - MapReduce: Scripts are executed on a Hadoop cluster (command:
pig -x MapReduce)
Since we have load the wikitechy_emp_details.txt in hdfs, start the Pig Grunt shell in MapReduce mode as shown below.
1 | C:\WINDOWS\system32>pig -x mapreduce |
Load the file in a variable ‘student’
Now load the data from the file student_data.txt into Pig by executing the following Pig Latin statement in the Grunt shell.
1 | grunt> student = LOAD 'hdfs://localhost:9000/pig_data/wikitechy_emp_details.txt' |
Check result using DUMP operator (write result to the console)
1 | grunt> Dump student |

If you have encountered any problems, please read through the Troubleshooting section.
Troubleshooting 故障排除
Pig is not recognized as an internal or external command
1 | C:\WINDOWS\system32>pig -version |

Make sure your is correct
From this:
1 | set HADOOP_BIN_PATH=%HADOOP_HOME%\bin |
Change to:
1 | set HADOOP_BIN_PATH=%HADOOP_HOME%\libexec |
After Dump command, the process keep looping
Pig when ran in mapreduce mode expects the JobHistoryServer to be available.
This is because the job history server is not running.
Check marped-site.xml has these properties stated or not.
To configure JobHistoryServer, add these properties to mapred-site.xml replacing hostname with actual name of the host where the process is started.
1 | <property> |
The result would be like this: